6.05.2012

EZ Dresden Ruler post 2 - the Snake Trail Tutorial


I love this quilt. I cut this picture out of a Garnet Hill catalog years ago and stuck it in a file so I could recreate it someday. I wasn't sure of the name of it and asked around. Elisa found out some great info on it - thanks Elisa!

Here is what she found:

There is an awesome post about variations of this type of block here. It has tons of pictures which could inspire you to come up with your own great project!

If you have EQ6 or EQ7 - you can download the Playing with Snakes project. This post will show you what it's all about.

This page from a book by Pepper Cory shows how you can change up the Snake Trail (also called a Drunkard's Trail because it is related to a Drunkard's Path).

And this post shows you how to draw your own block!


And now for my own tutorial on the Snake Trail

1. Cut a 3 inch wide strip of fabric.


2. Align your EZ Dresden Ruler so that the 1" line and the 4" line are on each edge of your strip. Cut along both  angled sides.


You will end up with a block like this


3. Flip your ruler over and line it up again with the 4" line and the 1" line on each strip edge. Line up the left edge of the ruler with the left edge of the fabric. Continue cutting along the length of the strip.


You will end up with blocks like these.


4. Once you get your blocks cut - arrange them so that you have 5 in a row. Sew them together and press.
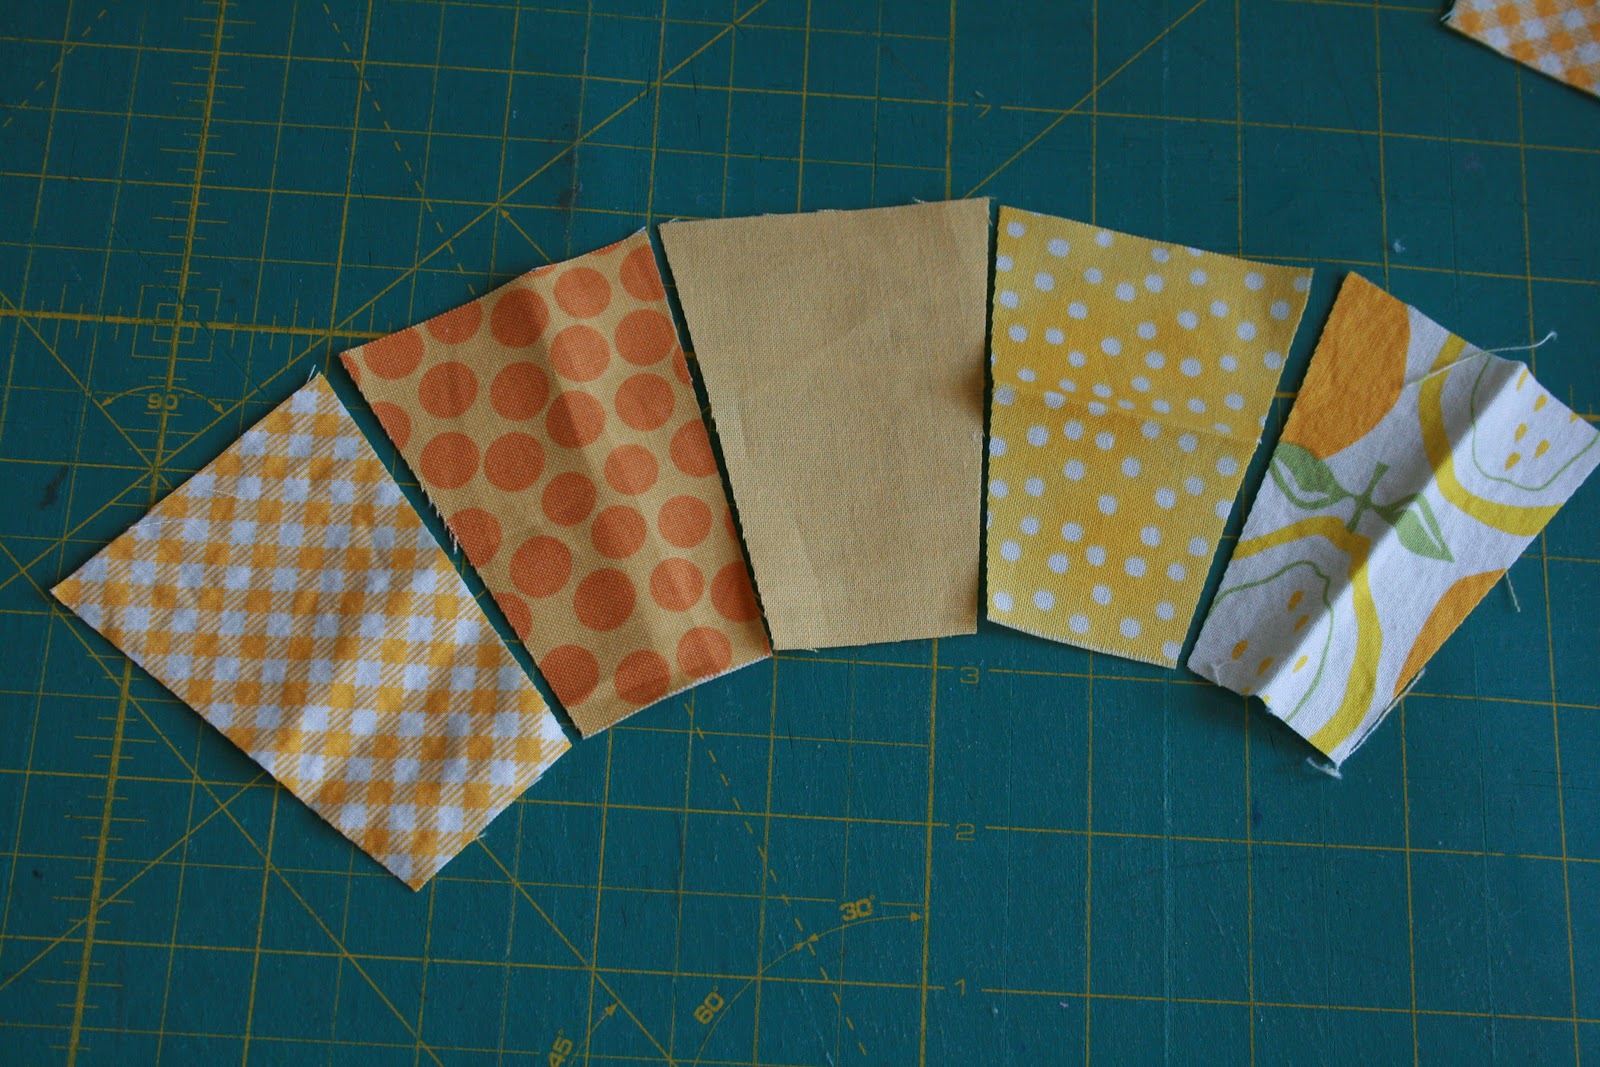

Here is what you will have when you're done sewing. You will need 2 arcs like this for each 8.5 inch (unfinished) block.


5. Print a template and cut it out. (Download the template HERE). Make sure when you print it, you print it at actual size, 100%, or whatever it is that keeps the sizing correct for your printer. When you cut out the pieces, they should go all the way to the edge of an 8.5 inch wide paper. 

You will have 3 pieces (2 corners and a middle). Cut 1 of each for each 8.5" (unfinished) block. I doubled up my fabric to get 2 of each piece.
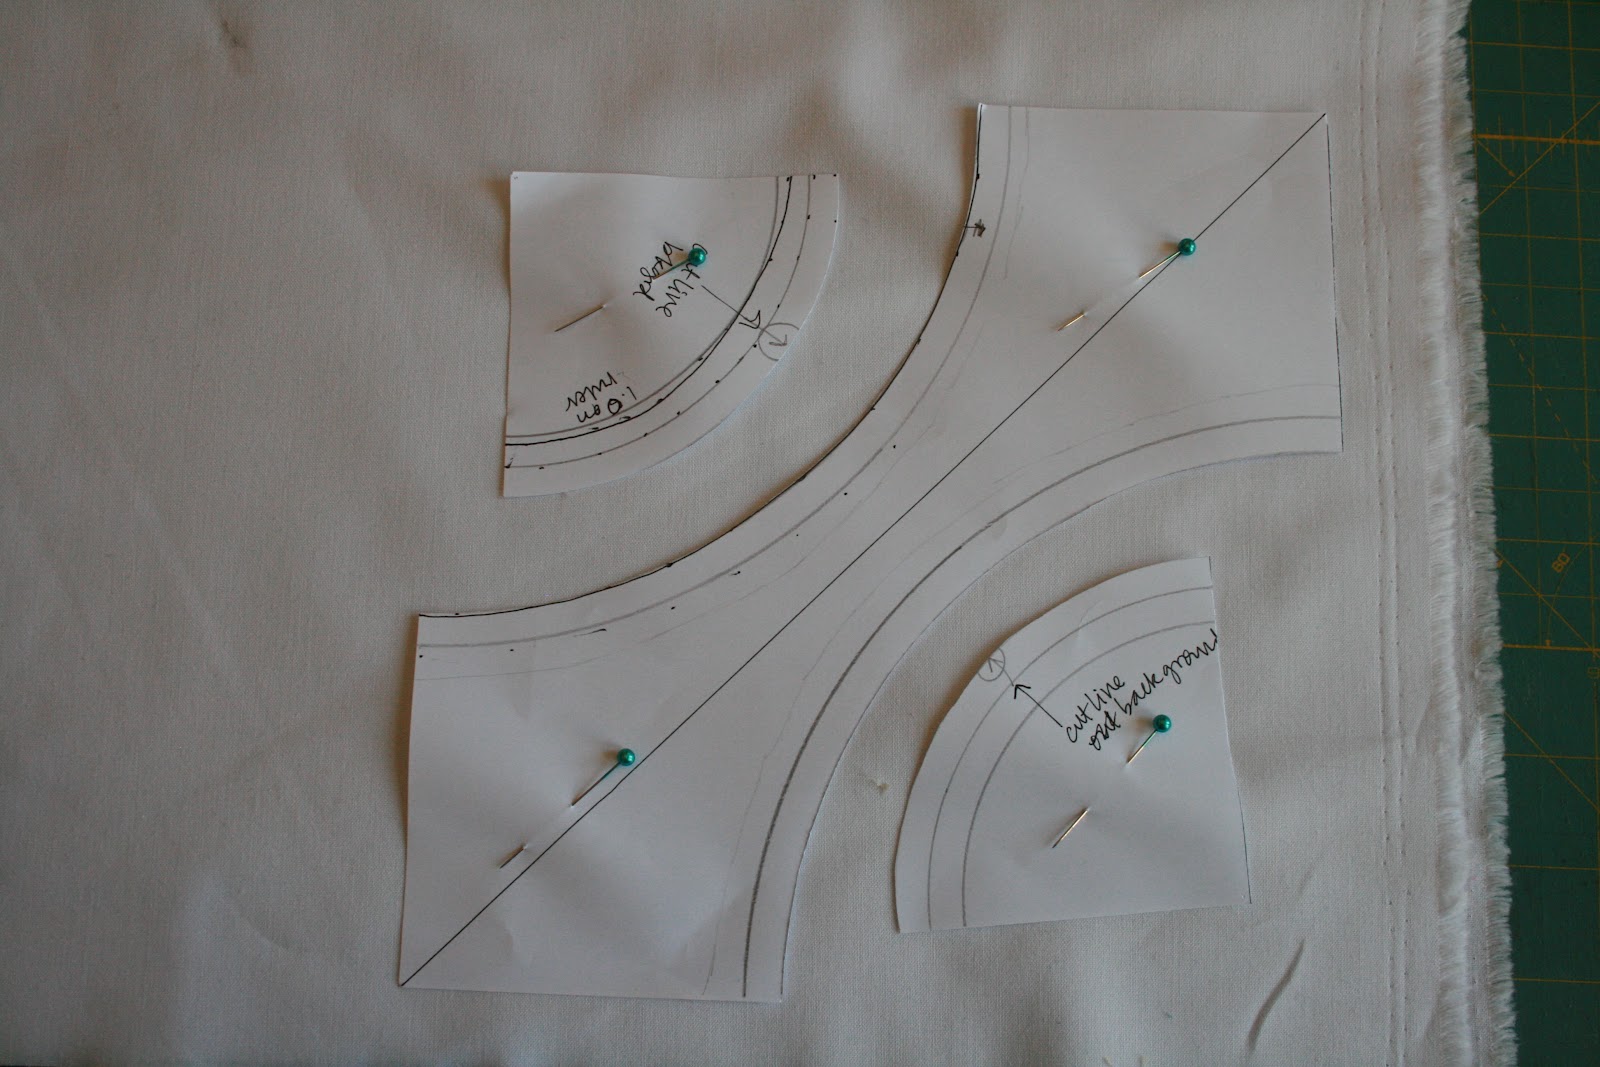

Here is what you will have.


6. Lay out your pieces like this. This is how they will be pieced. There is no need to trim your arcs into perfect curves. You can piece them as they are.


7. When piecing curves, you need to pin. I am usually not a pinner, but for curves it is a must. Start by finding the middle of each piece and pinning them right sides together.


8. Next pin the edges.

8. Next pin everything in between. You cannot have too many pins when pinning a curve.


9. Now you can sew them together. I would suggest sewing with your background piece on top since it is a more accurate curve.

10. Once you've sewn all the curves together (4 for each block), you'll have a block that looks like this. As you can see, it's a little wonky. Sewing curves will do that sometimes. I used starch and steam to try to stretch it into place, and then I trimmed it up to 8.5 inches.


And that is how you make a Snake Trail block! 

There are a few different ways to put them together ...


But I'm going to stick with my original plan. Maybe by the end of the summer I'll have an entire quilt!


Thanks so much for stopping by. I hope you liked my tutorial. If you'd like to win your very own EZ Dresden Ruler please leave a comment on this post OR my other post telling me something fun you're planning to do this summer. I will pick a winner on Saturday, June 9th. 

I hope you've had a chance to check out the other posts and don't forget to check out the upcoming ones as well. All details on the Salt Lake Modern Quilt Guild website. Thanks so much for stopping by and have fun sewing!

EZ Dresden Ruler post 1 - Diameter Chart

Hi everyone and welcome to my blog! I hope you're excited about this Dresden ruler challenge. I've thought of so many ideas since I got the ruler and can't wait to make something great with it!

I decided to do a post about diameter since I couldn't find one out there. I wondered how long I should cut my Dresden blocks and how big that would make my Dresden plate. I looked around and didn't find anything, so I decided to make a chart for easy reference.

If you are trying to figure out how big you want your final Dresden plate and how long you need to cut each piece, this table is for you.


I've included the diameter for a Dresden plate with points, and one for and unfinished Dresden plate. I've added some photos to help explain this chart.

Here is the block. It could be anywhere from 1 inch to 8 inches in height.


Here is the pointed Dresden plate. The diameter that I've included on my chart is only with perfect 1/4 inch seam allowances. When I made this one it measured 10 inches instead of 10.25. Because there are so many seams, if you are off, even a little, it will change your diameter in the end.


And here is the unfinished Dresden plate. Outer diameter and inner diameter end up being the same measurement on my table. You will have to adjust the diameter for finished edges.

Another thing you might want to know is that you'll need 20 blocks to make a full circle with the EZ Dresden ruler. 

I hope that clears things up. If you have any questions, I'd be happy to answer them if you leave me a comment or send me an email.

If you'd like to win your very own EZ Dresden ruler - please leave a comment on this post OR my other Dresden post. Please tell me something fun you're planning to do this summer. I will pick a winner on Saturday, June 9th.

I hope you've had a chance to check out the other posts and don't forget to check out the upcoming ones as well. All details on the Salt Lake Modern Quilt Guild website. Thanks so much for stopping by and have fun sewing!

5.31.2012

EZ Dresden Challenge - coming tomorrow!


The Salt Lake Modern Quilt Guild is hosting a challenge using the EZ Dresden ruler and it kicks off tomorrow! First there will be 2 weeks of posts to give you some ideas about how to use the ruler. Then during the summer you will have a chance to work on your own project using the ruler. And then in September you'll be able to link up your creation and have a chance to win some awesome prizes from some pretty awesome sponsors! There is even a sewing machine in there!

Here is the schedule for the blog hop - notice I'm on June 5th - this coming Tuesday. I'm excited about what I've been working on and hope you come back to see it! Also - don't forget to check out all the other great bloggers who've got posts coming up. Go over to the Salt Lake Modern Quilt Guild site tomorrow and check out all the details!
June 1
Salt Lake MQG: Kick Off www.slmqg.com/
June 10
Elizabeth: www.dontcallmebetsy.com/
Colleen: www.thebusybean.com/
June 14
Jessica: sewcraftyjess.blogspot.com/
June 15
Salt Lake MQG: Wrap-up www.slmqg.com/

5.30.2012

teacher quilts

It seems like forever that I have posted, or sewn for that matter. I've been trying to makeover my dining room and I'm almost done with it. And then in between that I've been sick. And this week I got called for jury duty. And then the kids are out of school - and all my time is gone!

But a few days ago I realized that if I wanted to make quilts for my kids' teachers - I'd better get to it! My 3 kids in school all had wonderful teachers this year (I haven't been able to say that every year.) And so I wanted to make them something special.

This first quilt is for a teacher who loves green. I think she likes owls too, but who wouldn't love that cute little guy. I just improv pieced the center part from scraps and then added borders. I wish I would have made the improv piece just a little bit bigger, but I do like how it turned out. I did a large scallop for the quilting on my home machine. It's something I've wanted to try for a while and it worked well. I'll definitely be using it again.


This next quilt is for a teacher who is fairly patriotic. I figured I'd be safe with red, white and blue. I used Jeni's giant vintage star quilt tutorial which was easy to follow and came together really quickly. I did change the center blocks to squares, but that was the only thing I changed. I used my stash for this one, except I didn't have quite enough for the background, so I did go buy that. I just did straight, vertical lines for the quilting to get it done quickly.


Is it horrible that I didn't make the 3rd teacher a gift? She told my son her favorite colors are pink, brown, and purple. Those are the colors I have the least of in my stash. And I just wasn't quite sure of her style. I'd hate to make her an entire quilt that she didn't end up liking. I think I'll be making her a Jane Market Bag and fill it with summer stuff. If any of you have another great idea - I'd love to hear it :)


5.03.2012

Sale and giveaway

Hi all -

Some of you know I have an etsy shop that has nothing to do with fabric. I make jewelry, mostly earrings, and they are for sale over here in my etsy shop.


I thought it would be a great time to have a sale, since Mother's Day is just around the corner. So from now until Mother's Day everything in my shop is 20% off! Just use the code MOM20.


Amy is hosting a giveaway over at her blog - Diary of a Quilter, so if you want a chance to win a pair of earrings - head on over!

p.s. I got a new header and button for my etsy shop! Made by my lovely sister Katie! Thanks Katie :)

4.30.2012

I can't quit you granny

So the granny craze started and I jumped right in! I made these blocks over a month ago, but I feel like I've been so busy - my blogging has fallen by the wayside.

Here are the blocks I've got so far. I'd like to have 48 and make a twin sized quilt. We'll see if that happens any time this year.

I do have all the blocks cut (even the white ones). These were all from scraps and I think I'll have extras. Maybe I'll do a giveaway of my extras if I ever finish all my blocks ...


2.16.2012

scrappy fish quilt

So I joined the Scrap Attack Quilt Along hosted by Rachel of Stitched in Color. Truthfully I had other ideas for my scrap quilt, and I still may try to execute those plans, but for now - this quilt turned out exactly how I'd planned it.


When I saw this quilt by Katie of Sew Katie Did I knew I wanted to make one.

One month I made these blocks with scraps for the Harmony circle of do. Good stitches {a charity bee} and I LOVED the colors together. My sister Katie was pregnant at the time and I thought she'd love this color combo as well.


And so I started making her new baby a quilt using only scraps. I still have a few scraps left over. 


Can you tell here that I used white strips to piece that whole white strip? 


For the back I used scraps from the backing of this quilt. It's just pieced with all the same fabric. And for the binding I used 2 different oranges that were smaller than a quarter yard. 

For the quilting I just did a curvy/straight line (is there a name for that?) with my new walking foot. I have a Brother sewing machine and I've never had good luck with the walking foot it came with. Kati had the same problem and started using a generic walking foot and had much better luck. I bought a new generic one and I'm happy to report that my straight quilting is the best I've ever done. If you've had trouble with straight line quilting, I'd look into getting a new/different walking foot.

What else?

I've also joined another quilt along with Dana of Old Red Barn Co. I am in love with that Granny Square quilt! I think I'll make a twin size. 

I've got a few other things to share soon too. What have you been up to?